A single misplaced wire behind bathroom tile can mean ripping out an entire wall six months after installation. Before you install led bathroom mirror units, you need a clear plan for three things most tutorials gloss over: where the power supply hides, how high the mirror sits relative to every person who uses it, and whether the unit actually survives years of steam and splashing water.
Studio Matrx’s installation guides recommend roughing in a fused 230 V feed behind the mirror location before tiling, then centering the mirror at eye level above the finished floor. Skip that sequence, and you’re chasing wires through freshly grouted surfaces. Below, you’ll find the exact wiring method, height formula, and IP44 verification steps that keep the job clean and code-compliant.
Key Points
-
The costliest mistake happens when electricians and tilers work on different schedules without coordinating the power feed location, forcing you to chase wires through freshly grouted surfaces or rip out walls months later.
-
Rough in a dedicated fused spur with a recessed junction box centered behind the mirror’s exact footprint before any tile goes up, using 1.5 mm² twin-and-earth cable and a 3 A fused connection unit for mirrors under 500 W.
-
Position your mirror’s vertical center at eye level above the finished floor so the LED perimeter lighting illuminates faces evenly rather than hitting the top of the head or bottom of the chin.
-
IP44 certification means the mirror resists water splashing from any direction and qualifies for bathroom Zone 2, but you should demand a test report number or recognized certification mark on the data label because cheap imports print the rating without third-party testing.
-
After connecting the mirror’s flex to the recessed junction box and restoring power, run the shower for five minutes and check for moisture ingress around the electrical connection, because condensation inside the LED strip channel means the seal has failed and the unit should be returned before permanent mounting.
What is install led bathroom mirror?
The costliest mistake happens before the mirror even arrives.
Electricians and tilers work on different schedules, and if no one coordinates the power feed location, the wiring ends up in the wrong spot or, worse, gets buried under tile with no junction box access.
Installing an LED bathroom mirror means hardwiring a backlit fixture into your bathroom’s electrical system while meeting moisture-zone safety codes. You need to coordinate rough-in wiring with tile work, mount the unit at the correct height for daily use, and verify waterproof ratings before you seal everything behind the wall.
Rough in a fused supply directly behind the mirror
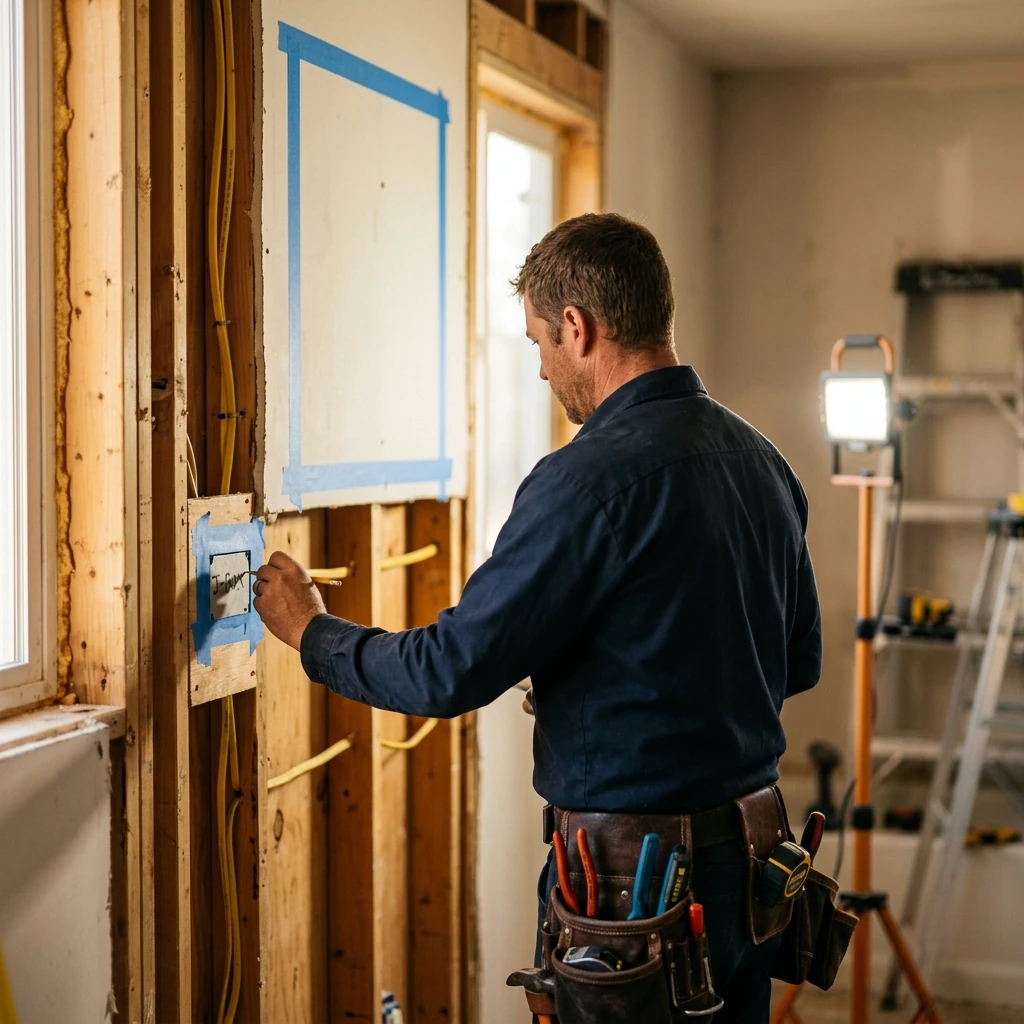
Mark the mirror’s exact footprint on the bare wall using painter’s tape.
Run a dedicated fused spur from your consumer unit to a connection point centered within that taped area.
The cable should terminate in a recessed junction box that sits flush with the finished wall surface. Most LED mirrors connect via a short flex that plugs into this box, so the entire electrical join hides behind the mirror body.
Use 1.5 mm² twin-and-earth cable for mirrors rated under 500 W, which covers nearly every residential LED unit. A 3 A fused connection unit on the supply side protects the circuit without requiring a separate breaker.
Why GFCI protection matters in moisture zones
The Electrical Safety Foundation International’s 2026 safety guidance advises powering bathroom mirrors from GFCI-protected circuits paired with AFCI coverage where local codes require it. A ground-fault device trips in milliseconds when current leaks through moisture, which is exactly the scenario a bathroom presents every morning.
If your existing bathroom circuit lacks GFCI protection, have a licensed electrician upgrade the breaker or add a GFCI outlet upstream of the mirror’s fused spur.
This isn’t optional in wet locations.
Before the tiler starts, photograph every cable run and junction box location. You’ll want that reference if you ever need to service the connection without exploratory demolition. If you haven’t already checked your wall surface and backing, the LED Mirror Installation Checklist: Prepare the Wall Before Delivery walks through the structural prep that should happen at the same stage.
How to install led bathroom mirror at the right height
There’s no universal “correct” height because households vary.
But there is a reliable formula that works for most adults without forcing anyone to crane their neck.
The center-line rule for average adult eye level
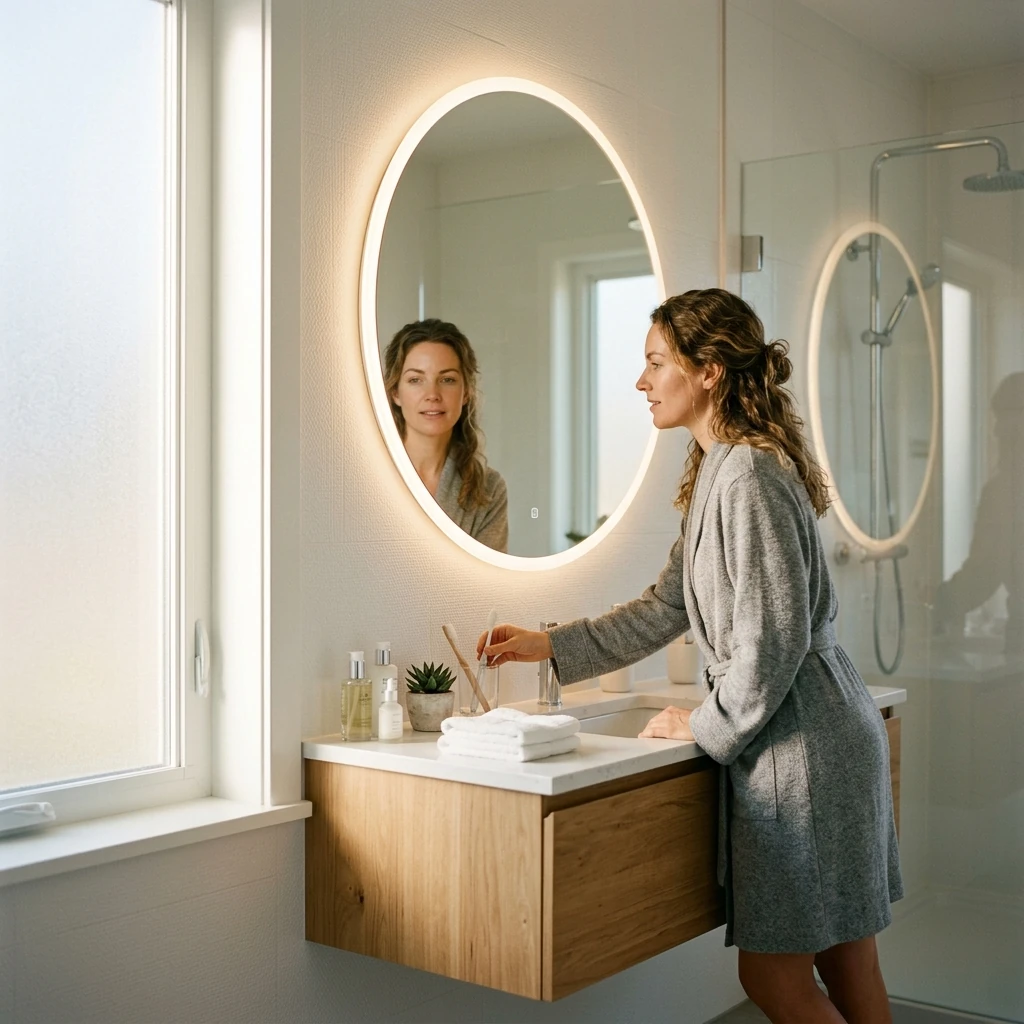
Position your mirror’s vertical center at eye level above the finished floor. For a 700 mm tall mirror, that puts the bottom edge roughly up from the floor, which clears most vanity-mounted taps and soap dispensers.
Where does that number come from?
It places the reflective center at eye level, which means the LED perimeter lighting illuminates your face evenly rather than hitting the top of your head or the bottom of your chin.
Adjusting for your household
Taller households can push the center higher. If children use the same bathroom regularly, consider a mirror that’s tall enough (800 mm+) to serve both adults and kids without lowering the center point.
A quick test: have the tallest and shortest daily users stand at the vanity.
Hold a cardboard template at your planned height. Both people should see their full face and shoulders without tilting the template. If someone’s forehead gets clipped, raise the center 20 mm. If a shorter user can’t see their chin, go taller on the mirror itself rather than dropping the mount.
Getting proportions right matters beyond just height. The LED Mirror Size Guide: Find the Best Proportion for Your Wall covers width-to-vanity ratios that keep the final look balanced.
IP44 waterproofing: what to verify before you buy
IP44 sounds like an obscure engineering spec, but it’s the single number that determines whether your mirror belongs in a bathroom at all.
Decoding the IP44 rating
The first digit (4) means the enclosure blocks solid objects larger than 1 mm, like tools and thick wires. The second digit (4) means it resists water splashing from any direction. Together, IP44 qualifies a mirror for bathroom Zone 2, which covers the area extending 600 mm outward from the edge of your bath or shower and everything above 2.25 m.
Most vanity mirrors sit squarely in Zone 2.
If your mirror hangs directly above a bathtub or inside a shower enclosure (Zone 1), you need IP65 or higher. Don’t guess your zone; measure it.
How to spot genuine certification
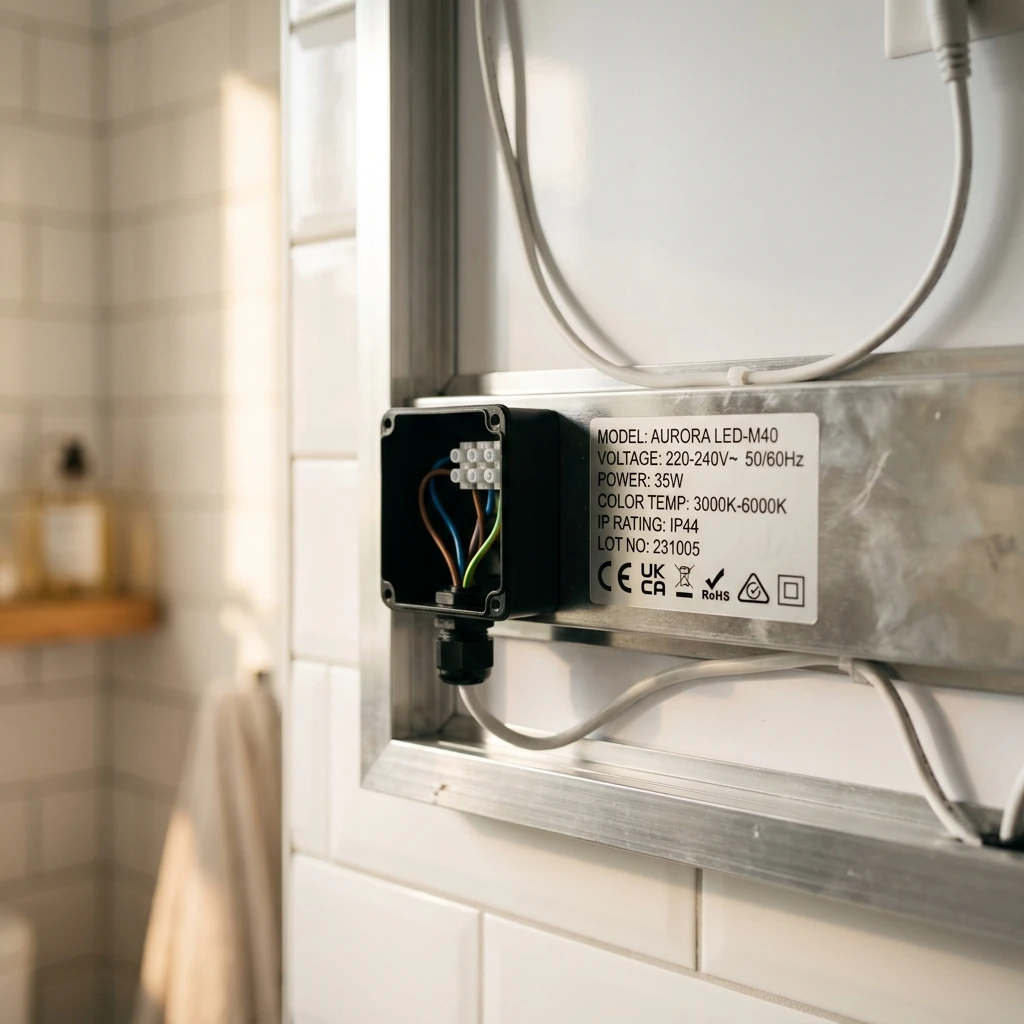
Cheap imports sometimes print “IP44” on the box without third-party testing. Look for a test report number or a recognized certification mark on the mirror’s data label.
Ask the manufacturer for the test certificate.
Reputable brands provide it on request. If a supplier can’t produce documentation, treat the rating as marketing copy rather than engineering fact.
The IEA’s push toward 100% LED lighting sales has accelerated production globally, but quality control hasn’t kept pace everywhere. Verifying IP ratings yourself protects you from fixtures that fog internally or corrode at the terminals within a year.
MirrorManShip provides IP44 certification documentation with every bathroom-rated LED mirror and offers custom LED bathroom mirrors with touch controls designed specifically for wet environments. That transparency matters when you’re burying the wiring inside a wall you don’t want to open again.
How to install led bathroom mirror step by step
With wiring roughed in, height marked, and IP44 confirmed, the physical installation is straightforward.
What tools and fixings do you need for a secure mount? Transfer the mirror’s mounting bracket template to your wall. Drill into the marked points using a masonry bit for tiled walls, and insert wall plugs rated for the mirror’s weight plus a safety margin. Hang the bracket, level it with a spirit level, then connect the mirror’s flex to your recessed junction box.
Restore power at the consumer unit and test both the LED lighting and the demister pad (if equipped) before pushing the mirror flush to the wall.
Once it’s seated, run your shower for five minutes and check for any moisture ingress around the electrical connection.
That final steam test catches problems while they’re still easy to fix. If you spot condensation inside the LED strip channel, the seal has failed and you should return the unit before permanent mounting.
Frequently asked questions
Do I need a professional electrician to install an LED bathroom mirror?
In most homes, yes, especially if you are adding a new fused connection unit, modifying a bathroom circuit, or working in regulated bathroom zones. A qualified electrician helps ensure your work meets local electrical regulations and is safe in a high-moisture environment.
Can an LED bathroom mirror be hardwired if my wall is already tiled?
It can be, but it typically requires careful cable routing and may involve surface trunking or opening a small section of wall to place an accessible connection point. If you want a clean concealed finish, it is often better to plan a compliant access strategy rather than hiding connections where you cannot service them.
What should I check about my wall before mounting a heavy LED mirror?
Confirm what is behind the tile (studs, block, plasterboard) and choose fixings designed for that substrate. If your wall is hollow or has dot-and-dab gaps, use fixings that bridge the void or secure into solid structure for long-term stability.
How do I prevent LED mirrors from flickering or buzzing after installation?
Flicker and buzzing are often caused by incompatible dimmers, loose connections, or poor-quality drivers. Use a mirror and switch gear rated for each other, and if dimming is required, confirm the driver supports your dimming method before purchase.
What maintenance helps an LED bathroom mirror last longer in humid bathrooms?
Wipe the glass with non-abrasive cleaners and keep water from pooling along the edges and control areas. Good ventilation, such as using your extractor fan during and after showers, reduces moisture stress on seals and electronics.
Are touch controls and sensors reliable in wet environments?
They can be reliable when designed for bathroom use, but performance depends on sealing quality and control placement. Look for clearly stated moisture protection for the control module, and avoid units where the controls feel loose or poorly bonded to the glass.
What should I do if I see condensation inside the mirror or light channel months later?
Treat it as a seal or enclosure failure and stop using the mirror if moisture could reach electrical components. Document the issue with photos, check your warranty terms, and contact the supplier promptly since internal moisture usually indicates a defect that will worsen over time.
Get your installation right the first time
Every choice in this process, from pre-tile wiring to center-line height to verified IP44 certification, serves one goal: a mirror that works perfectly for years without forcing you back into the wall.
Rough in your electrics early, measure height against real people, and never trust an IP rating you can’t verify with paperwork. When you inspect your next LED bathroom mirror, start with the data label and work backward through the supply chain until you find documentation that proves the rating is real.
Take the time now to coordinate your electrician and tiler, confirm your mounting height with everyone who will use the space, and demand certification documents before you commit to a purchase. The hour you spend planning saves you weeks of remedial work later.
Wire it once and forget it
MirrorManShip builds LED bathroom mirrors with certified IP44 protection and customizable sizing that fits the height and proportion guidelines covered here. Explore their full range at mirrormanship.com to find a mirror engineered for your exact bathroom layout.
Ready to find your mirror?
Explore shapes, lighting and sizes across the MIRRORMANSHIP collection.
Explore LED mirrors → View catalogue →